
00
Precheck
Ensure Claude Desktop works in Code mode.

-
1
Open the Claude desktop app and click the Code tab at the top of the window.
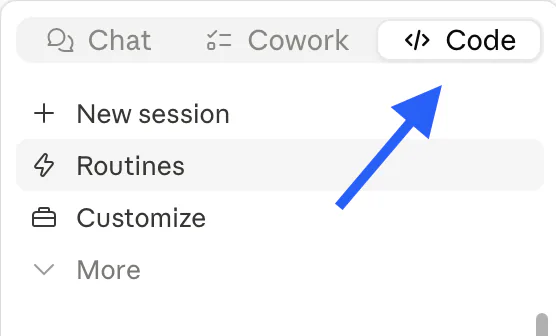
- 2 If Claude pops up a message that says Git is required, click Not now. Your Mac will then offer to install Apple's free command line developer tools — a window appears (or an installer icon shows up on the right side of your Dock). Click Install, agree, and let it finish. It takes about ten minutes.
- 3 No message about Git? Your Mac is already set — carry on to Step 1.

01
Download & install
Download and install ButterCut Pro.
The
ButterCut Pro Installer
is a tiny
.zip
file — a collection of instructions so Claude can download ButterCut Pro and
set everything up.
-
1
Download the installer, then find it (usually in your Downloads folder) and double-click to unzip. You'll get a folder named buttercut-pro-installer. Download the installer
- 2 Back in the Code tab, look at the bar along the bottom. Set the folder to that buttercut-pro-installer folder, and switch Cloud to Local.
-
3
Type this and send it:Paste into Claude
Install ButterCut Pro. - 4 Claude asks for the email and license key from your receipt. Paste them in. Claude downloads ButterCut Pro, saves your license so updates just work from here on, and installs everything it needs — about five to ten minutes, mostly waiting on downloads.
02
Edit
Open ButterCut Pro and start editing.
- 1 When Claude says ButterCut Pro is installed and ready, quit Claude completely (Cmd + Q, or right-click its Dock icon → Quit) and reopen it — a new chat alone won't pick up the changes. Then click the Code tab and set the folder at the bottom to buttercut-pro (it's in your home folder) — still Local. If a worktree option appears, leave it unchecked.
-
2
Type /buttercut to open the home menu. It welcomes you and walks you through creating your first library and first basic cut.Type into Claude
/buttercutThat's it — you're editing. The installer folder has done its job and can be deleted.
Run into a snag? Email Andrew directly.